To create a feelustrated novel, you need pictures with the proper license terms, a photo editor, a layout editor to create your formatted files, and high-quality printing.
Ideally, you would decide which pictures your book needs, then go outside and take them yourself.
Sometimes you might even do that.
But most of the time, your best bet is to decide what idea your picture should capture, then use that idea as a keyword to search a picture library.
Huge free image libraries exist, because the world is now filled with amateur photographers who want to see their work used, but have abandoned their dream of getting paid. Here are my favorites. (All are free for commercial use.)
Several web sites offer images at fixed prices (no royalties.) You don't want to hassle with royalty payments, and you don't have to.
I won't give you a complete list of for-pay image sites, but here are a few tips.
Pictures from Pixabay, Morguefile, and Unsplash can be used freely inside your book.
If you put a recognizable person on the cover, or in an ad, you need a model release. A similar restriction applies to art and buildings; you need a property release to put them on the cover or in an ad.
In theory, any recognizable person on Pixabay has signed a model release. Here's the relevant passage from the Terms of Service for Pixabay contributors:
You are solely responsible for the Content you upload. You warrant that:
- You own all proprietary rights in the Content you upload to the Website and that the Content does not infringe the copyright, property right, trademark or other applicable rights of any third parties; and
- You have obtained a non-exclusive, perpetual, irrevocable, worldwide, and royalty-free Model and/or Property Release, and/or any other permission necessary concerning the use of this work for any purpose, without any conditions, unless such conditions are required by law.
But Pixabay does not actually check for a model release, so if a Pixabay photo shows a recognizable person, art or building, I suggest you don't use it on the cover or in ads.
Adobe Stock and BigStockPhoto do require photographers to submit a model release, so their images can be used in your book or on the cover, except the pictures listed as, Editorial use only. Fortunately these restricted photos can be excluded in your search critera.
Adobe Stock's basic license is good for 500,000 copies, and BigStockPhoto's basic license is good for 250,000. The basic license certainly allows a picture to be used inside a book, and BigStockPhoto says it can be used for an ebook cover. For a print cover, it's not so clear. If you don't know better than me, then do what I did, and buy the extended license for your cover pictures.
If you take images from other sources, for example Flickr, be sure to check the license terms, because "Free" images are not always free for commercial use.
The best license terms are CC0 or Public Domain. Either can be used commercially without attribution. I give attribution voluntarily, and that's how I like it.
Sadly, some Flickr contributors render their beautiful images useless by prohibiting modification.
Beware any license that includes the word, share, because that's code for, give me your stuff.
Yes, you will be using other people's work for free, in a book you don't give away free. This is okay. Hobby photographers want to see their work used, or they wouldn't bother to upload it. But if you don't give them credit, you're a jerk.
Unfortunately, sometimes you can't avoid jerkdom, because you can't identify the original photographer. In that case it's polite, and prudent, to identify the source that certified the image as public domain.
You need a photo editor, because sometimes the perfect picture is ugly, but can be saved by adjusting its contrast and brightness. Even a beautiful picture might need editing to remove distracting elements.
Any good photo editor will work. My favorite is Corel PhotoPaint.
If you don't have a favorite, you might as well choose Adobe Photoshop. It's the 400-lb gorilla, and it comes in a package with Indesign and Adobe Stock, which you need.
Photoshop is hard to learn, but it won't take long until it starts to be fun. Please don't limit yourself to toys like MS Paint. If your vision does not deserve a real photo editor, it does not deserve your time.
Feelustration requires a fixed layout. The alternative, reflowable text, will leave your pictures in the wrong places. Sorry.
Fixed layout requires a good layout editor. As of this writing (April, 2017) that means Indesign, by Adobe.
I dislike Adobe software, because it's always bloated and non-intuitive. However, I spent months trying to get MS Word to handle high-quality images and export usable PDF and ebooks. I finally gave up and switched to Serif Pageplus, which I regret because Pageplus is now defunct.
Like me, you will eventually end up using Indesign, so you might as well bite the bullet early.
Indesign is hard to learn, and has weird idiosyncracies. No save button? Seriously? Who thought leaving out the save button was a good idea? But Indesign is the industry standard and can do just about everything, once you figure out how. Best of all, in thousands of hours of use, it hasn't lost or corrupted my (very large) files.
I have no connection to any of the products discussed on this page, except Gaia's Wasp.
Unfortunately, feelustration requires a fixed layout, so you must produce two versions: a print version with wide margins, and an e-book with narrow margins. When you edit (and you will) you'll have to change both versions, so it's worth the trouble to link the two layouts in a layout editor, something like Adobe's Indesign. Exactly like Indesign. Just use Indesign.
You must set your margins and page size correctly from the beginning, or you're in for grief. For your printed book, I suggest a finished size of 6X9" with one-inch margins. (6X9" is a standard paper size for printing.)
To complicate your task, the layout for your printed book must include 1/8" bleeds. The bleeds are extra margins to extend your pictures beyond the edge of the page, to ensure the picture doesn't stop just short of the edge and leave a white sliver.
The standard bleed is 1/8", so you must add 1/8" to your top, bottom and outer margins. This will increase your total page size to 6.125 X 9.25". Your pictures should extend all the way to the expanded page edges, so the outer 1/8" of your pictures will be lost when the book is trimmed to its final, 6X9" size.
For your ebook, use InDesign to create a second, linked layout with 5X8" pages, half-inch margins, and no bleed. Your ebook will have the correct 1.6 aspect ratio, and both layouts will use the same text boxes, 4X7".
If you set up your linked layouts correctly, text edits in your print layout will automatically update the text in your ebook layout. This is why the two layouts should use the same size text boxes. Otherwise, editing your print layout may cause your ebook layout to overrun its text box, or break its text lines in awkward places.
While the two layouts will use the same text boxes, they won't use the same size pictures. When you create the second layout, you must resize your pictures and move them around by hand. Image resizing can be automated with Indesign's Liquid Layout, but I find that takes more time than it saves.
Use a big font, 12 points for a typical serif font, or 10.5 for Arial, so a whole page of text will be readable on a Kindle Fire 7.
Don't forget to check the copyright terms on your fonts, to make sure you can use them commercially. Some popular fonts have limited or ambiguous license terms, including Cambria and Times New Roman.
All fonts in your ebook must be marked, embeddable, and some popular fonts aren't.
Pictures should be left in their native RGB format. For printing, they must be converted to CMYK, but that should be done at the last minute by the printer, based on the characteristics of his press.
Unfortunately, some RGB colors cannot be printed. These unprintable colors will be flagged by your image editor if you enable "Out of gamut" error checking.
File formatting for hardcover printing
The printer will need your book as a PDF. Fortunately, that's easy.
In the Indesign file menu, choose Export.
Choose filetype: Adobe PDF (Print.)
Poke through the various menus and set the output parameters to:
Formatting for Kindle
In the past, Kindle formatting was brutally difficult. Now it's easy.
In the Indesign file menu, choose Export.
Choose filetype: Adobe PDF (Interactive.)
Poke through the various menus and set the output parameters to:
Higher image quality and resolution are wasted on the Kindle, and will increase the Amazon download fee.
Now convert your PDF to the Kindle fixed-layout format.
Formatting your Epub
Indesign will create your Epub file.
Note: Some epub viewers can't handle the complex fixed-format files produced by Indesign. One ironic example is Adobe Digital Editions.
Feelustration is about beauty, which you can't achieve with bad printing. Sorry, but print-on-demand isn't good enough yet.
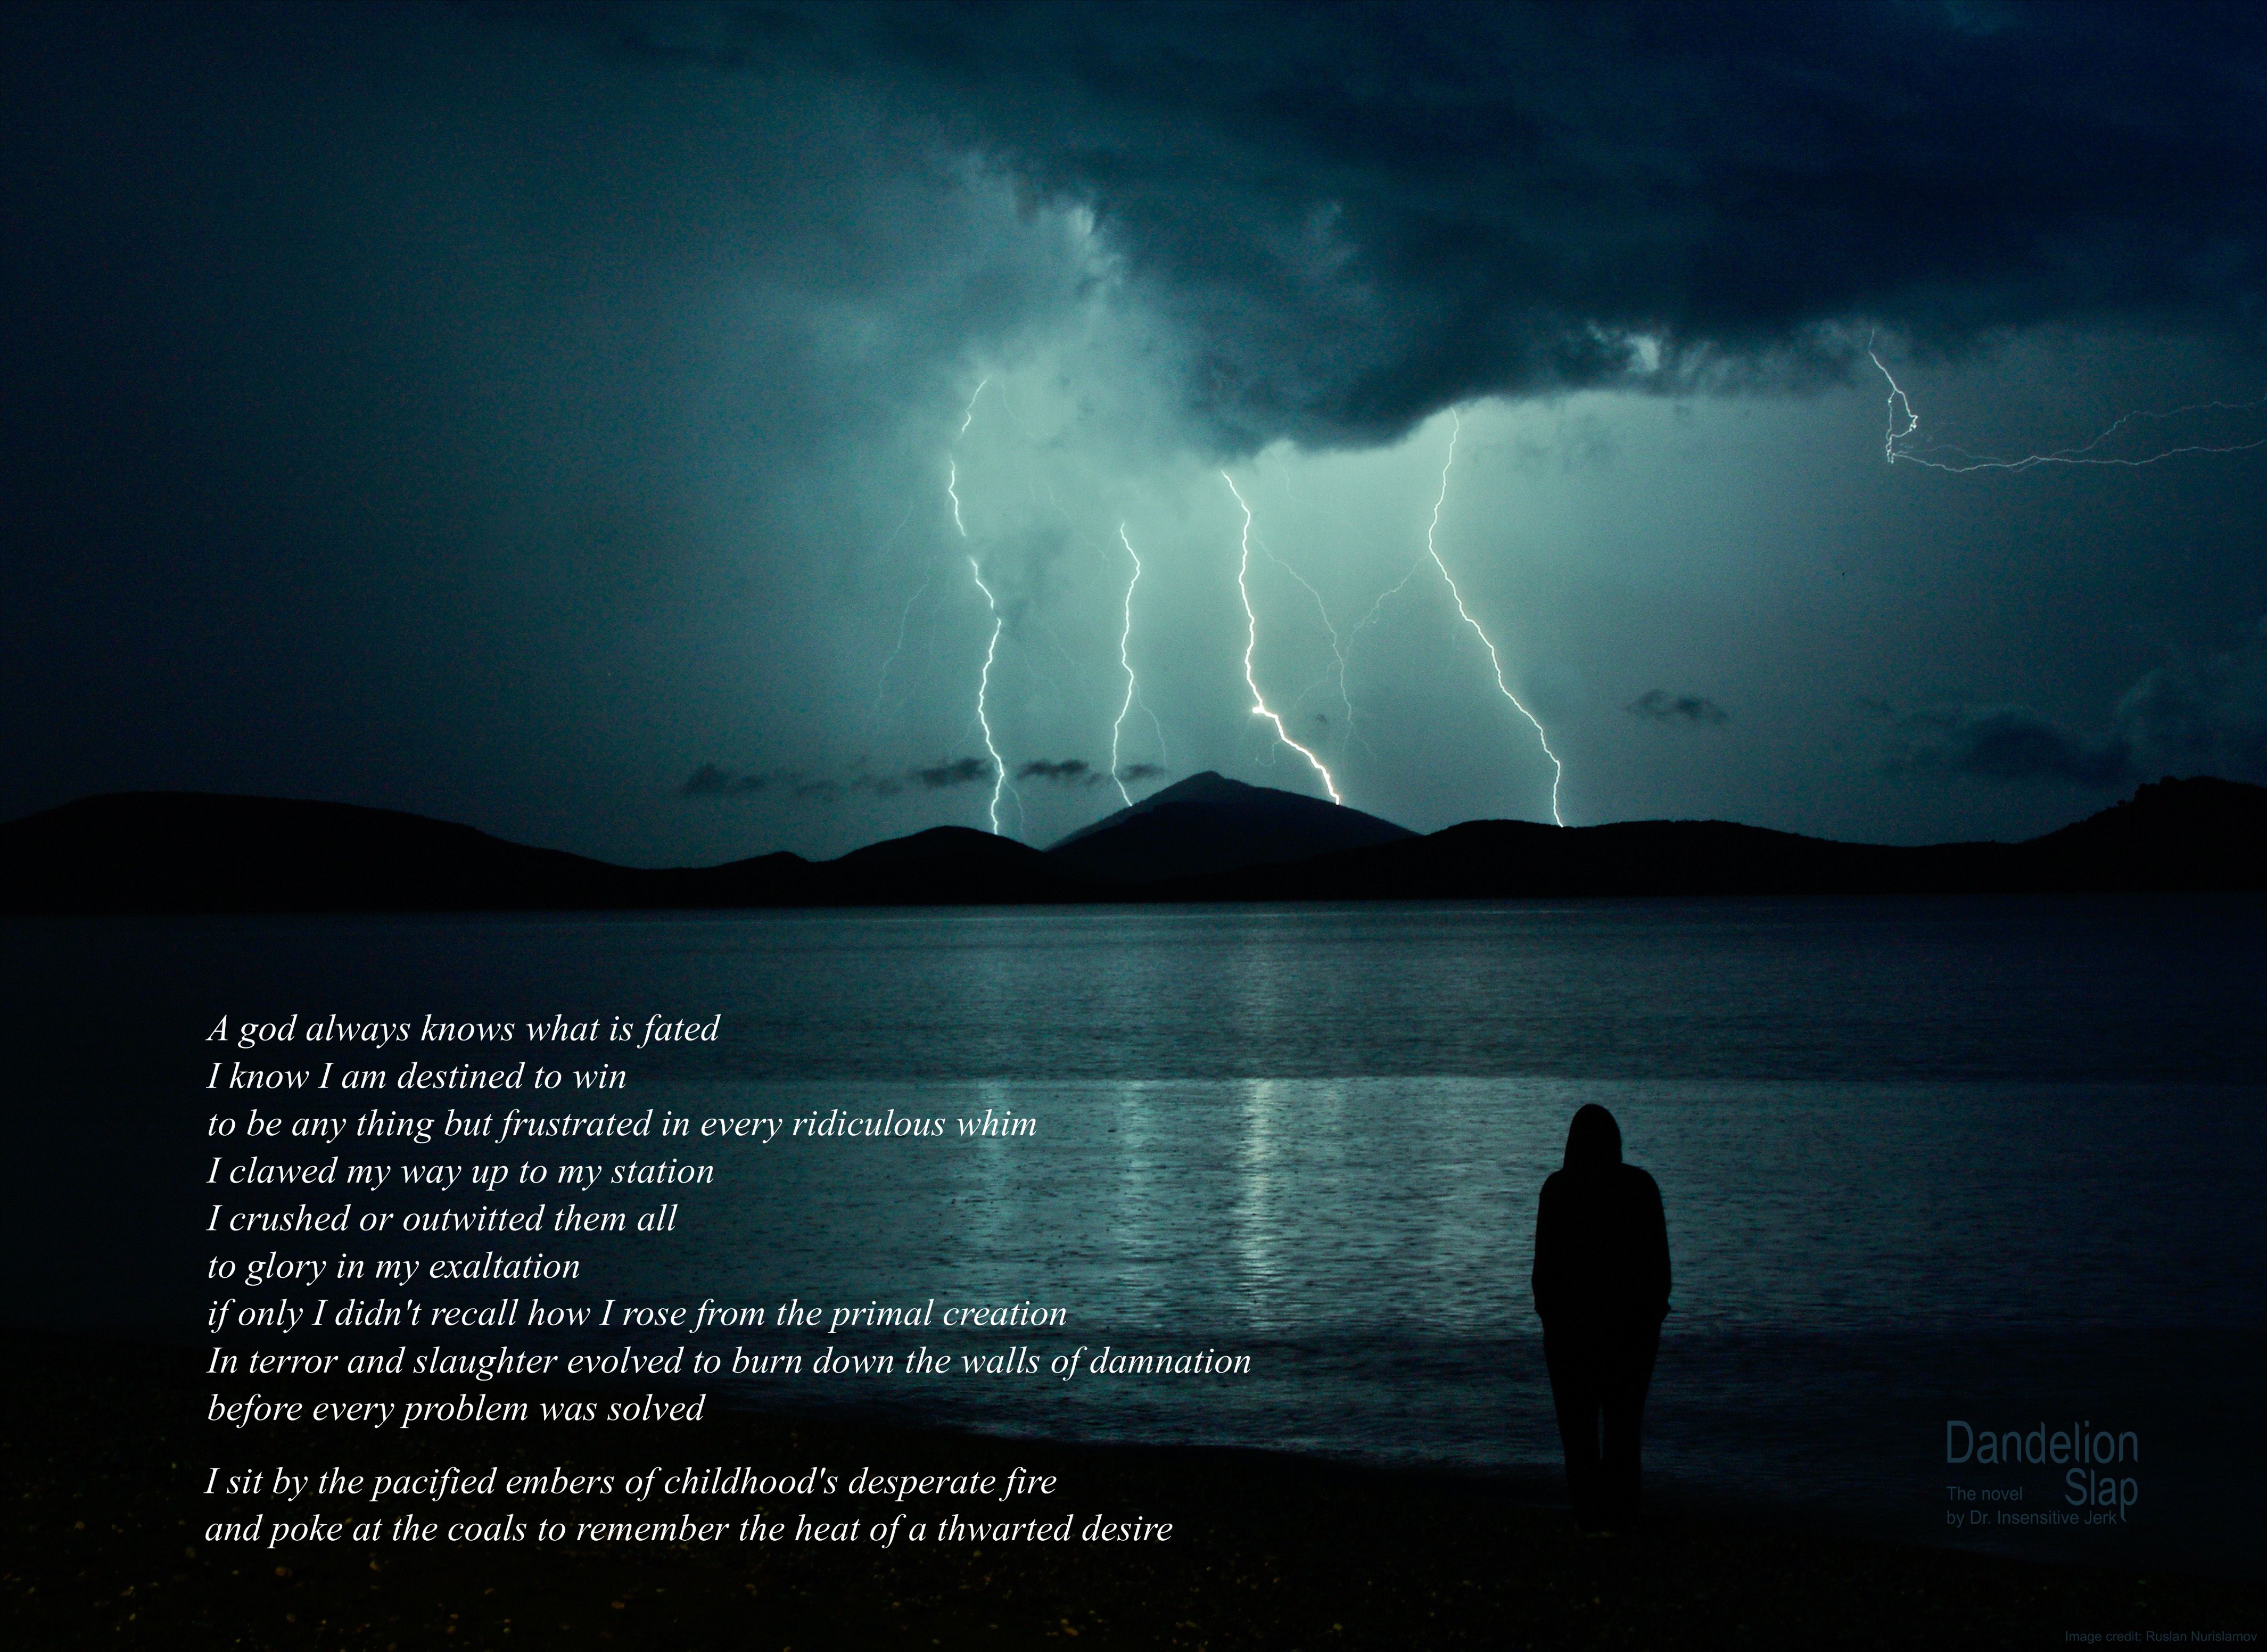
Here's how I know. These are two different hardcovers of Gaia's Wasp. The pics were taken with the same camera, lighting and compression, with no retouching. One of the books was printed with IngramSpark's premium color print-on-demand, while the other was printed with the traditional, 4-color offset process on coated paper.


The difference in gloss and saturation is the difference between beautiful and meh.
Coated paper is crucial, even though it increases weight and cost.
Here are the printing specs for a beautiful, feelustrated hardcover.